
Colours
Open /dashboard/assets/colorsThe colour palette is the list of colours a customer can put on a garment. It should mirror what your production line can actually dye or print, and nothing else. Everything in this library is something you are promising you can make.
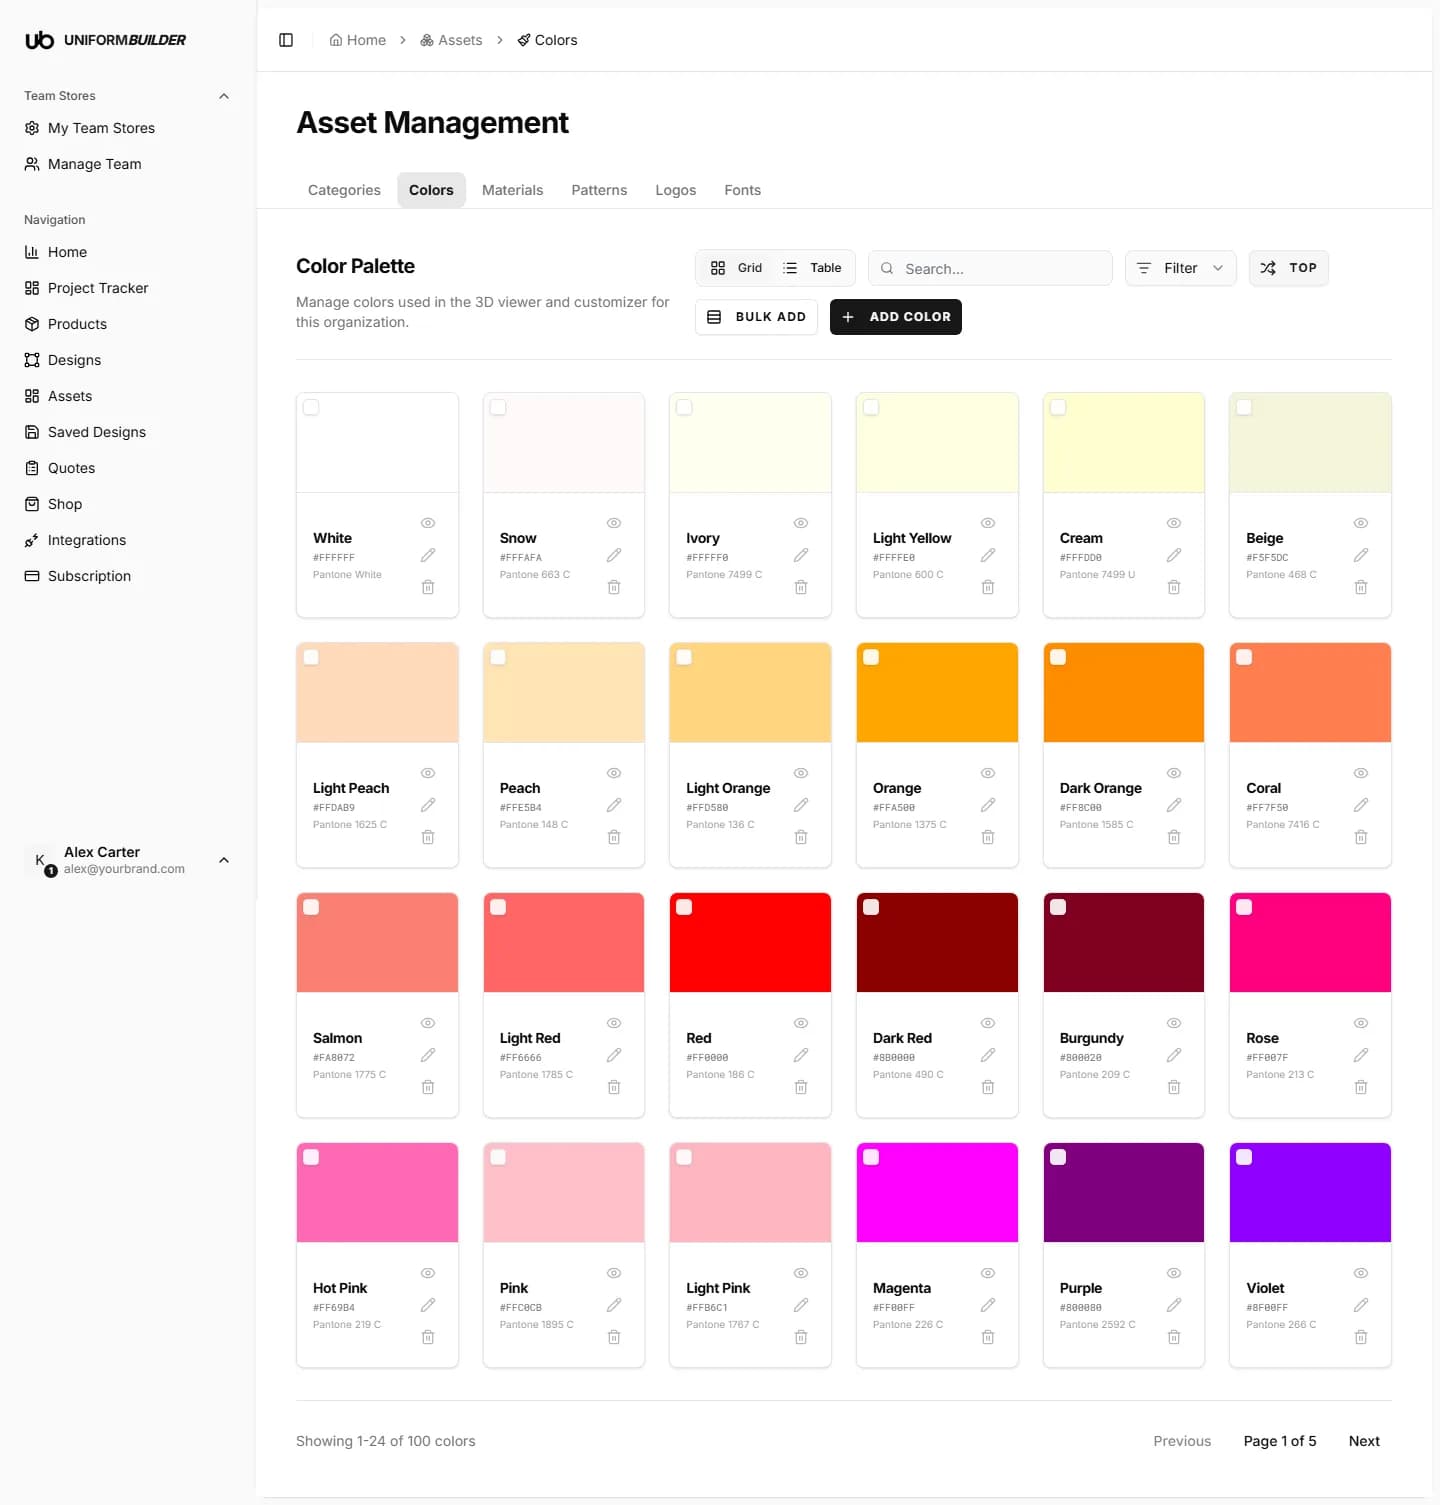
Open it from Assets in the sidebar, then the Colors tab.
Adding one colour
- 1
Click Add Color in the top right.
A dialog opens with the fields below.
- 2
Type a name. This field is required.
Use the name your production team already uses, for example "Midnight Black" or "Club Royal". Customers read this name in the designer, so avoid internal codes.
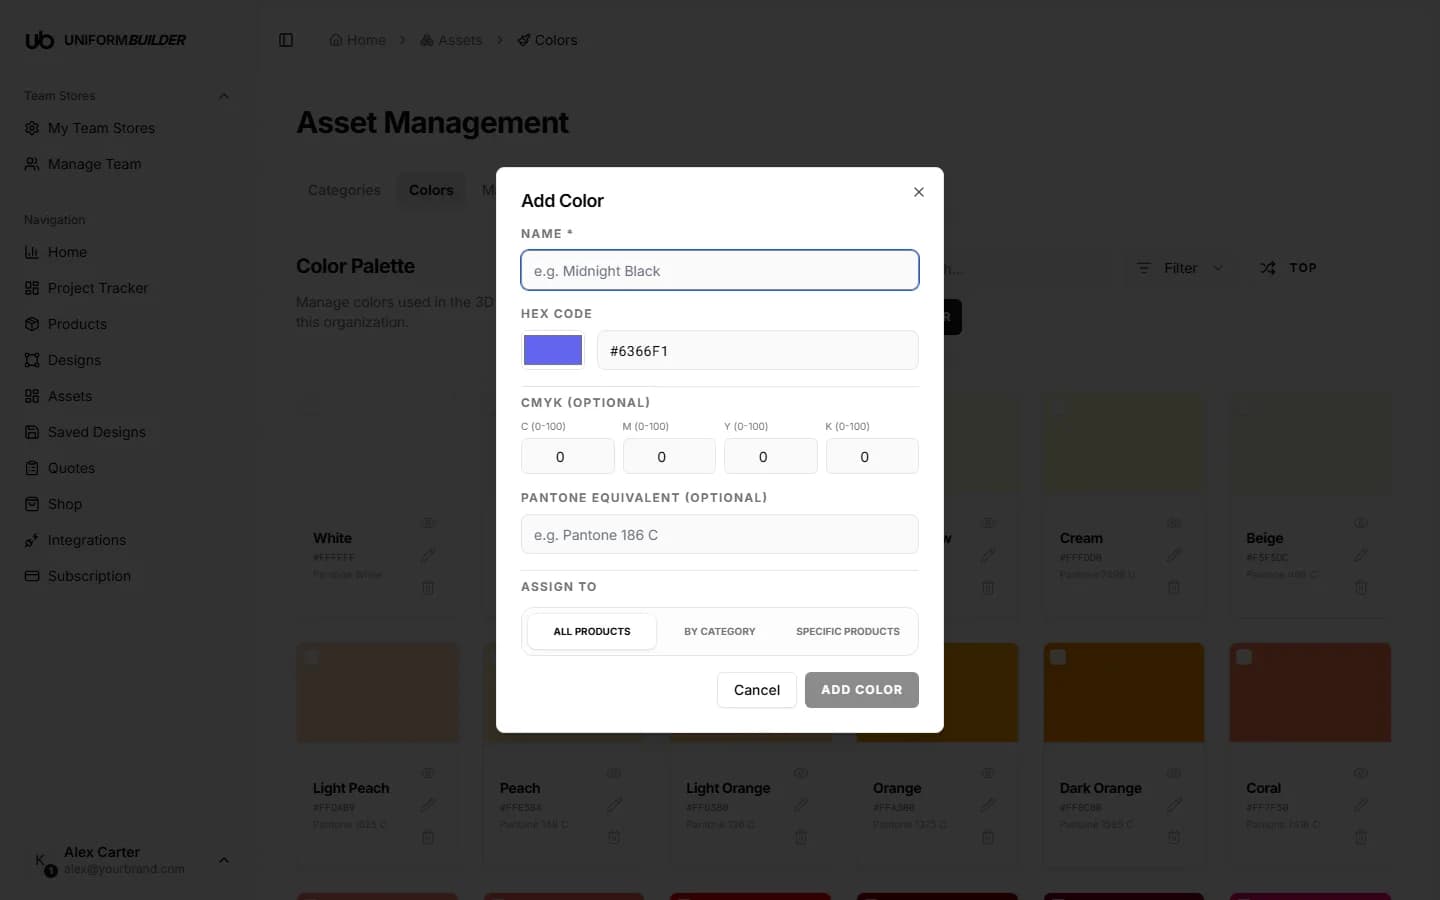
The Add Color dialog. Only the name is required; the rest is what makes the colour useful in production. - 3
Set the hex code.
Click the small square to pick a colour visually, or type a value like
#101820into the field next to it. This is what the 3D preview shows on screen. - 4
Optionally fill in CMYK.
Four boxes, each from 0 to 100. Fill these in if your printer works in CMYK. Leave them at 0 if you do not know them: an approximate value is worse than none.
- 5
Optionally fill in the Pantone equivalent.
For example
Pantone 186 C. This is the single most useful field for a fabric supplier, because a Pantone reference is exact and a screen colour is not. - 6
Choose Assign to.
All products, by category, or specific products. See the Assign to rule if you are not sure.
- 7
Click Add Color. The swatch appears in the palette immediately.
Adding a whole palette at once
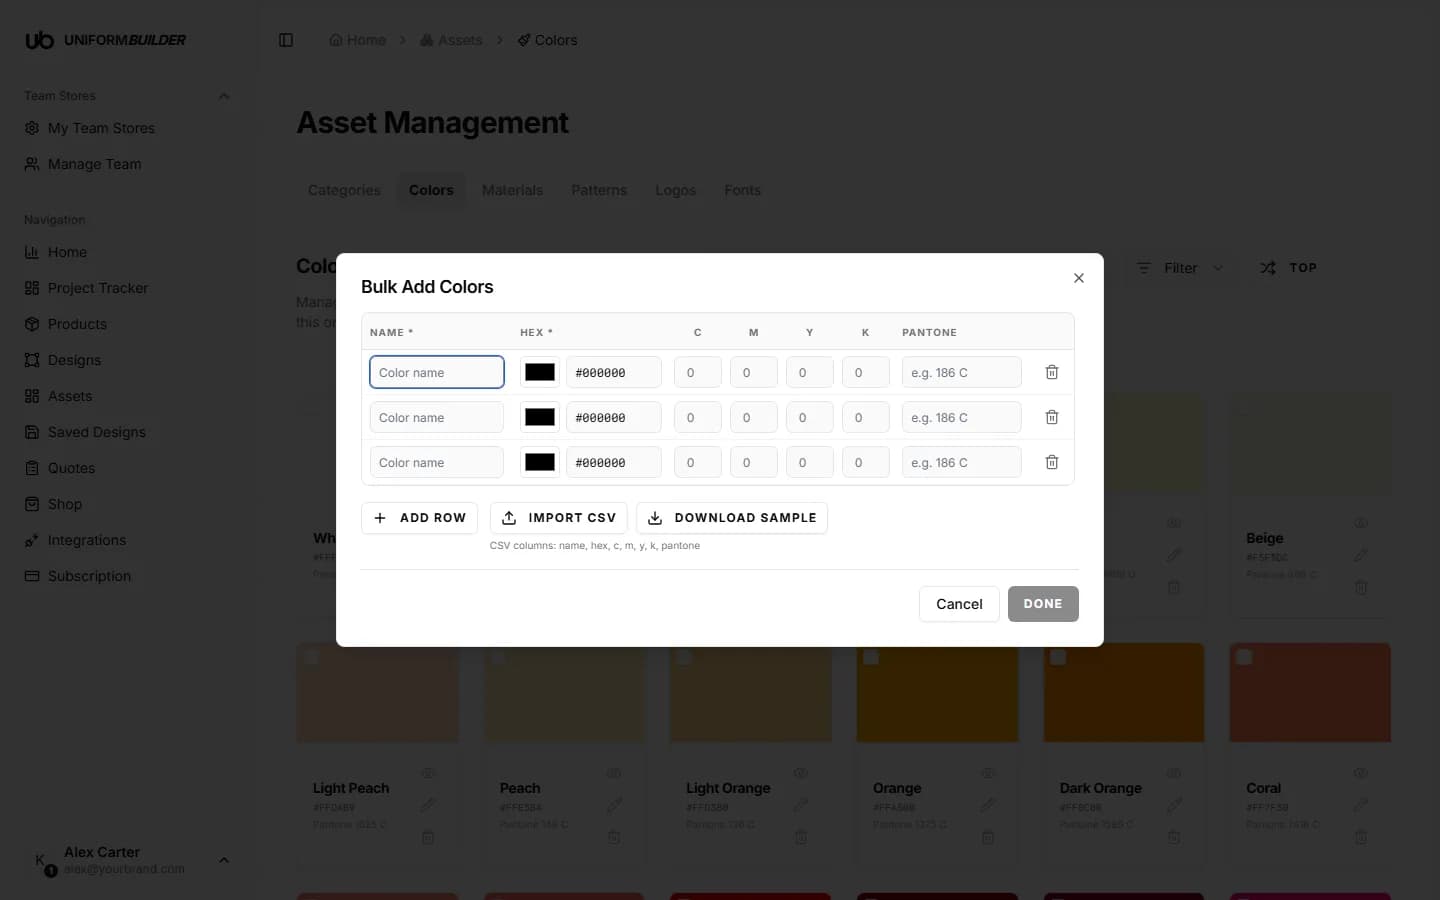
Adding forty colours one at a time is miserable. Use Bulk Add instead, which is the sensible way to load a supplier colour card.
Typing them in
- 1
Click Bulk Add in the top right.
- 2
Fill a row per colour: name, hex, then optionally C, M, Y, K and Pantone.
- 3
Click Add Row for each extra colour, or the bin icon to drop a row.
- 4
Click Done to save every row in one go.
Importing from a spreadsheet
- 1
Click Download Sample in the bulk dialog.
You get a CSV with the right column headings already in it.
- 2
Fill it in using the columns
name, hex, c, m, y, k, pantone.Only
nameandhexhave to be filled. Leave the rest empty if you do not have them. - 3
Come back, click Import CSV, and choose your file.
- 4
Check the rows that appear, then click Done.
Nothing is saved until you press Done, so this is your chance to fix a typo.
Organising the palette
- The Filter control narrows the list, which helps once you have a few dozen colours.
- The Top control pins your most used colours to the front, so customers meet your house colours first.
- The eye icon on a swatch previews it, the pencil edits it, and the bin removes it.
Common mistakes
Screen colour is not print colour
The hex value only drives the 3D preview. Two garments with the same hex can come off the line looking different depending on the fabric. Where colour accuracy matters, always record the Pantone or CMYK value as well: that is what the quote and the tech pack carry to your supplier.
Publishing colours you cannot produce
Every colour here is an offer. If a fabric only comes in eight colours, scope those eight to that product with Specific products rather than letting the whole house palette apply to it.
Removing a colour
Deleting a colour takes it out of the designer for new customers. Designs customers already saved keep the colour they were saved with, so past quotes stay readable.
A customer says the colour looked different on their screen.
That is normal: no two screens are calibrated the same. This is exactly why the Pantone field exists. Quote against the Pantone reference, not against the preview.
How do I stop one product offering every colour?
Open the product, find the Colour palette card on the Overview tab, and switch it to Assigned colours only. Then assign just the colours that product can be made in. See Products.
Which colours are customers actually choosing?
The Popular colours widget on Home ranks them, which is useful for deciding what to keep in stock.