
Team stores
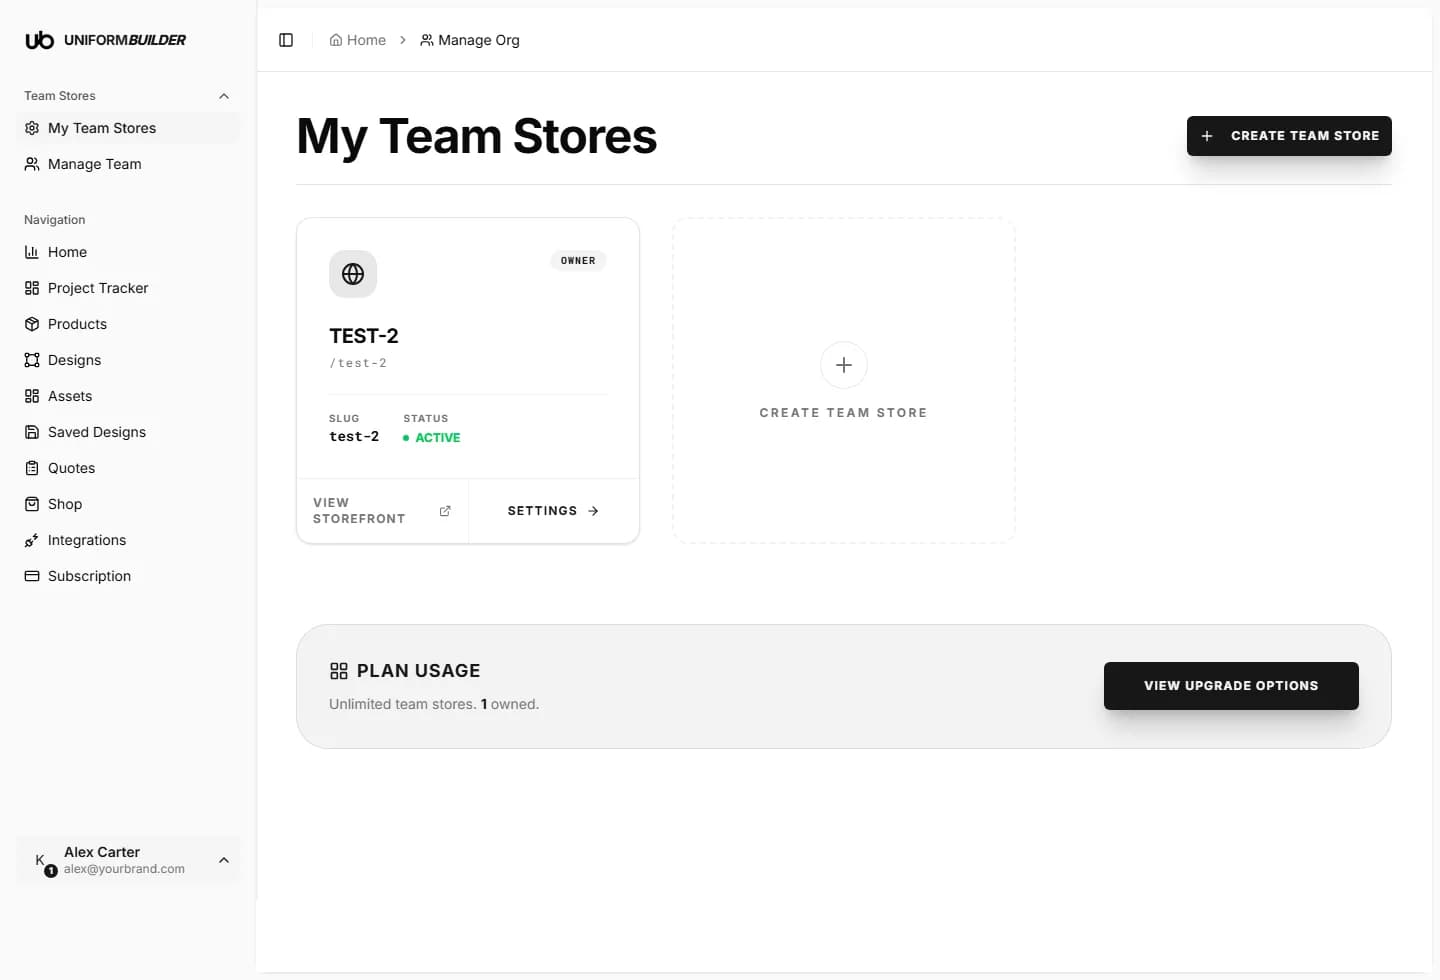
Open /dashboard/organizationA team store is your public presence and the container for all your work. It has a name, a URL, a currency, and a set of features you can turn on or off for the customers who visit it.
Creating a store
- 1
Open My Team Stores and press the button to create a store.
- 2
Enter a Store name and a Store URL.
The URL is the slug your customers visit: a store called "New York Giants" becomes
uniformbuilder.io/ny-giants. Keep it short, lowercase, and use hyphens.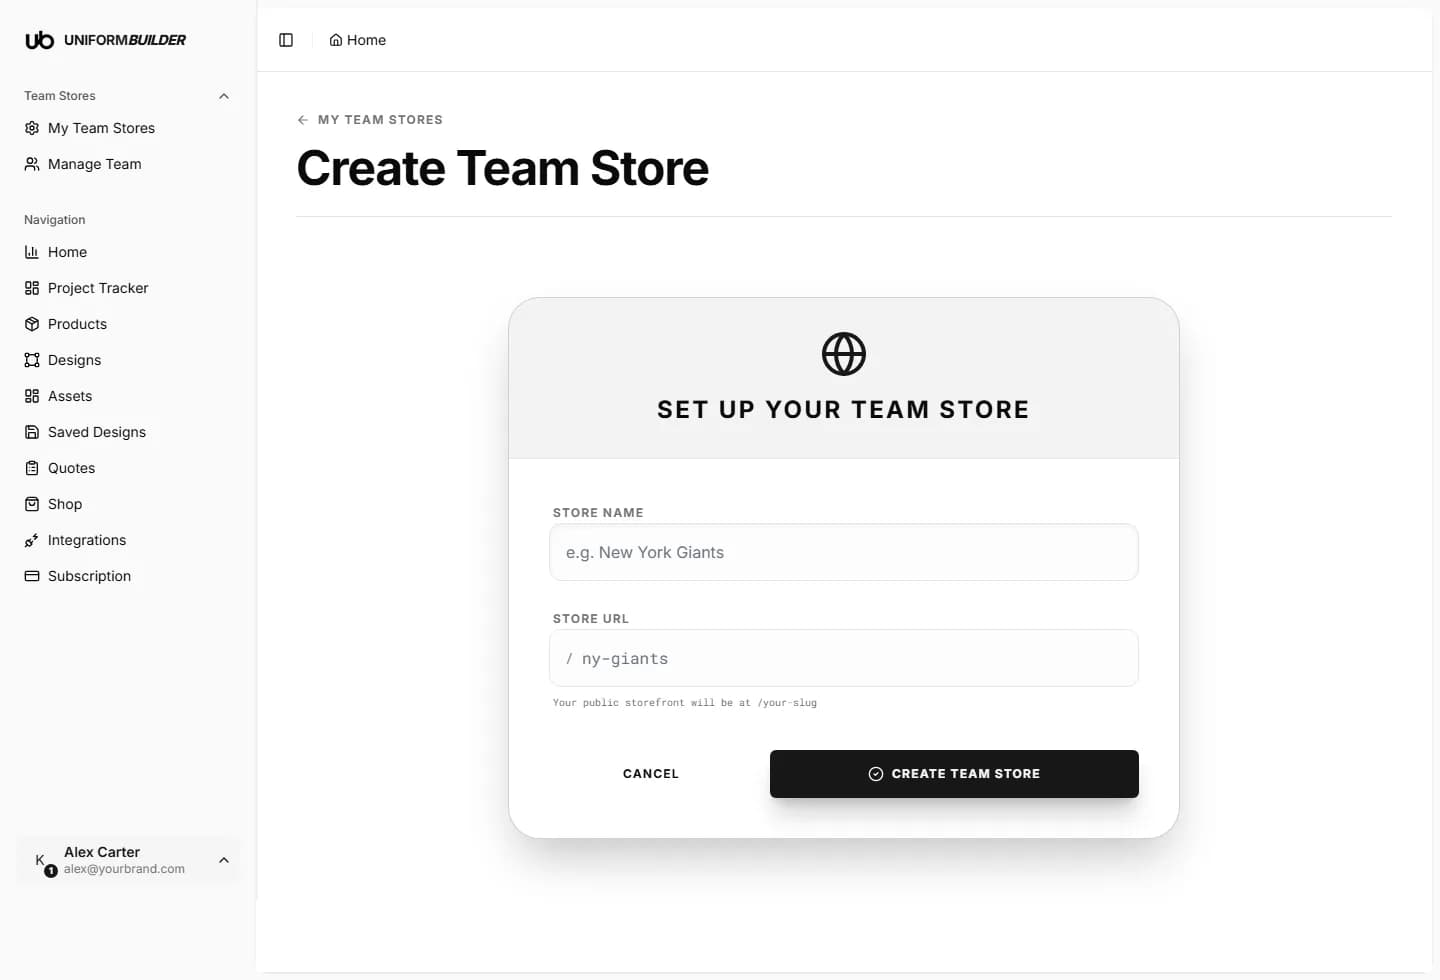
The two fields that matter: the name customers read, and the URL they visit. - 3
Press Create Team Store.
Choose the slug carefully
The slug is part of every link you will ever share and of every saved design link customers hold. Changing it later breaks those links.
How many stores you get
The number of team stores is set by your plan. The Plan usage panel at the bottom of the page shows what you have used, for example "1 of 1 team stores used". See Subscription.
Store settings
Press Settings on a store card to open its settings page.
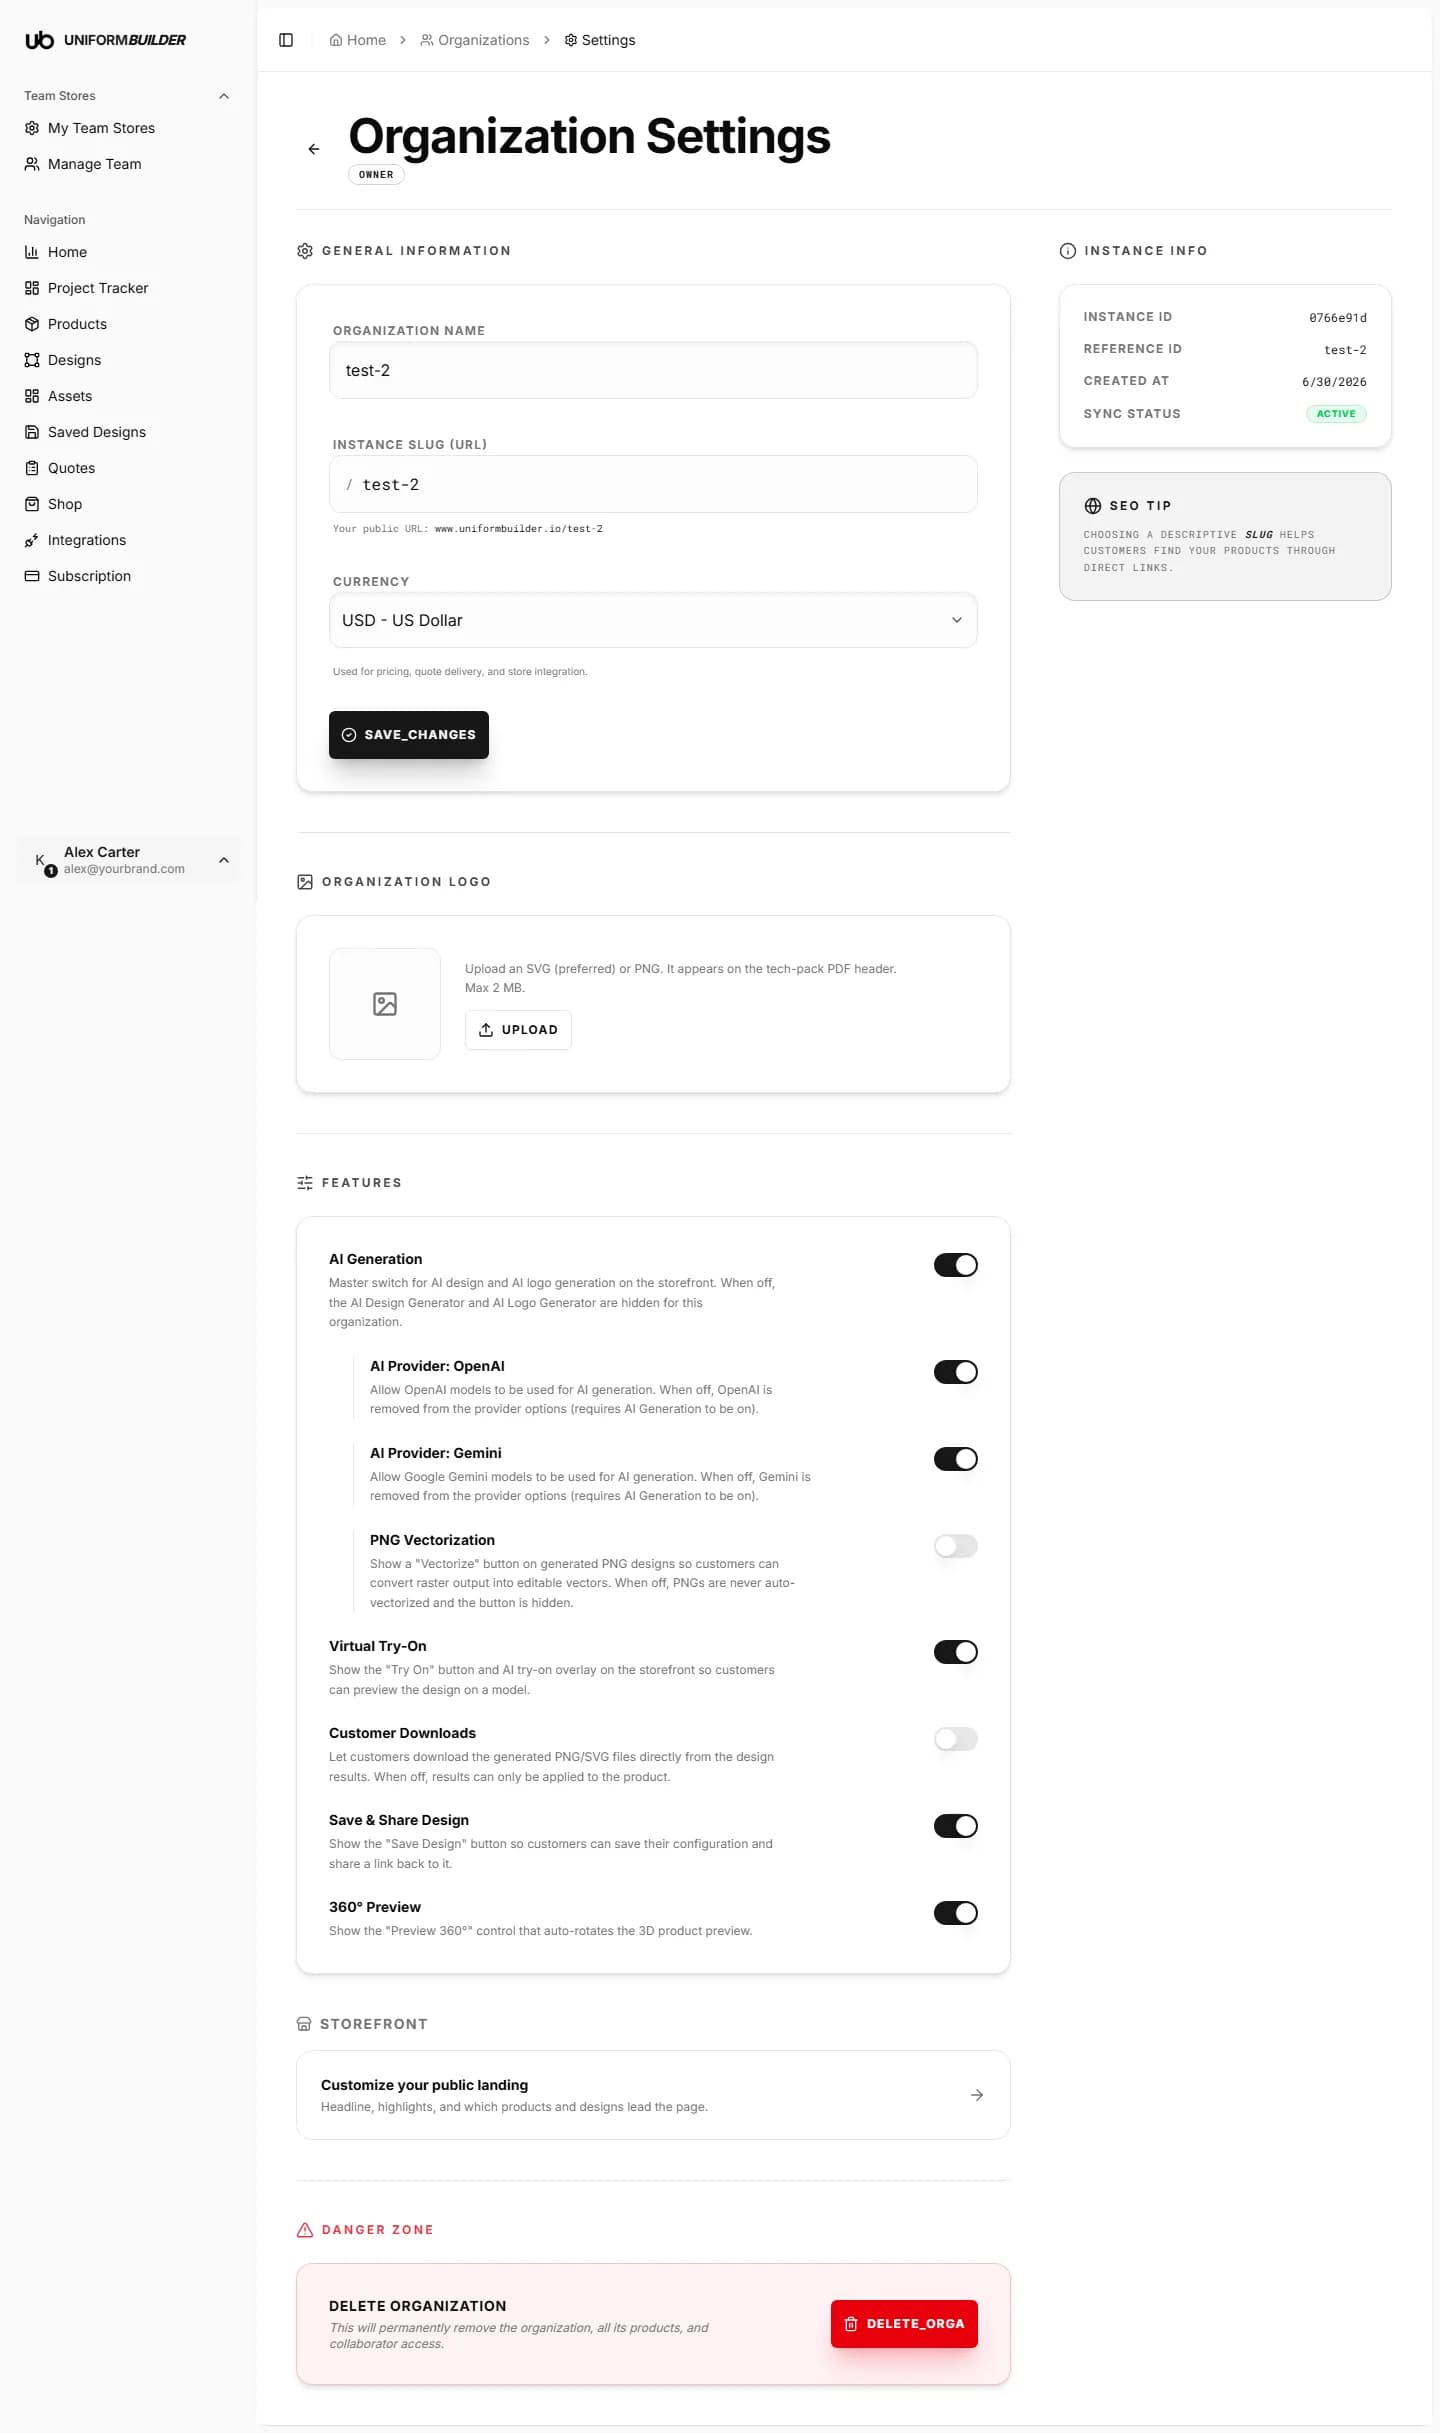
General information
| Field | What it does |
|---|---|
| Organization name | The display name customers and your team see. |
| Instance slug (URL) | The public address of the store. The full URL is shown underneath as you type. |
| Currency | Used for product prices, quote totals and store integrations. Set it before you enter prices. |
Press Save changes to apply. The Instance info panel on the right shows the reference id and creation date, which support may ask for.
Store logo
Upload an .svg (preferred) or .png, up to 2 MB. This logo appears on the header of the tech-pack PDF generated from a quote, so use the print quality version rather than a web thumbnail.
Designer features
The Features panel controls what customers can do in your public designer. Each switch takes effect immediately.
| Field | What it does |
|---|---|
| AI Generation | Master switch for the AI design and AI logo generators. When off, both are hidden from your storefront and no AI credits can be spent there. |
| AI Provider: OpenAI | Allows OpenAI models to be used. Requires AI Generation to be on. |
| AI Provider: Gemini | Allows Google Gemini models to be used. Requires AI Generation to be on. |
| PNG Vectorization | Shows a Vectorize button on generated PNG artwork so customers can turn it into editable vectors. When off, PNGs are never auto-vectorized. |
| Virtual Try-On | Shows the Try On button and the AI try-on overlay, so customers can preview a design on a model. |
| Customer Downloads | Lets customers download the generated PNG and SVG files. When off, artwork can only be applied to the product, never taken away. |
| Save & Share Design | Shows the Save Design button so customers can save a configuration and share a link back to it. Feeds Saved designs. |
| 360° Preview | Shows the control that auto-rotates the 3D product preview. |
A sensible default
Leave Customer Downloads off unless you want people to be able to take the artwork elsewhere to print. Everything else is usually worth having on.
Editing the public storefront
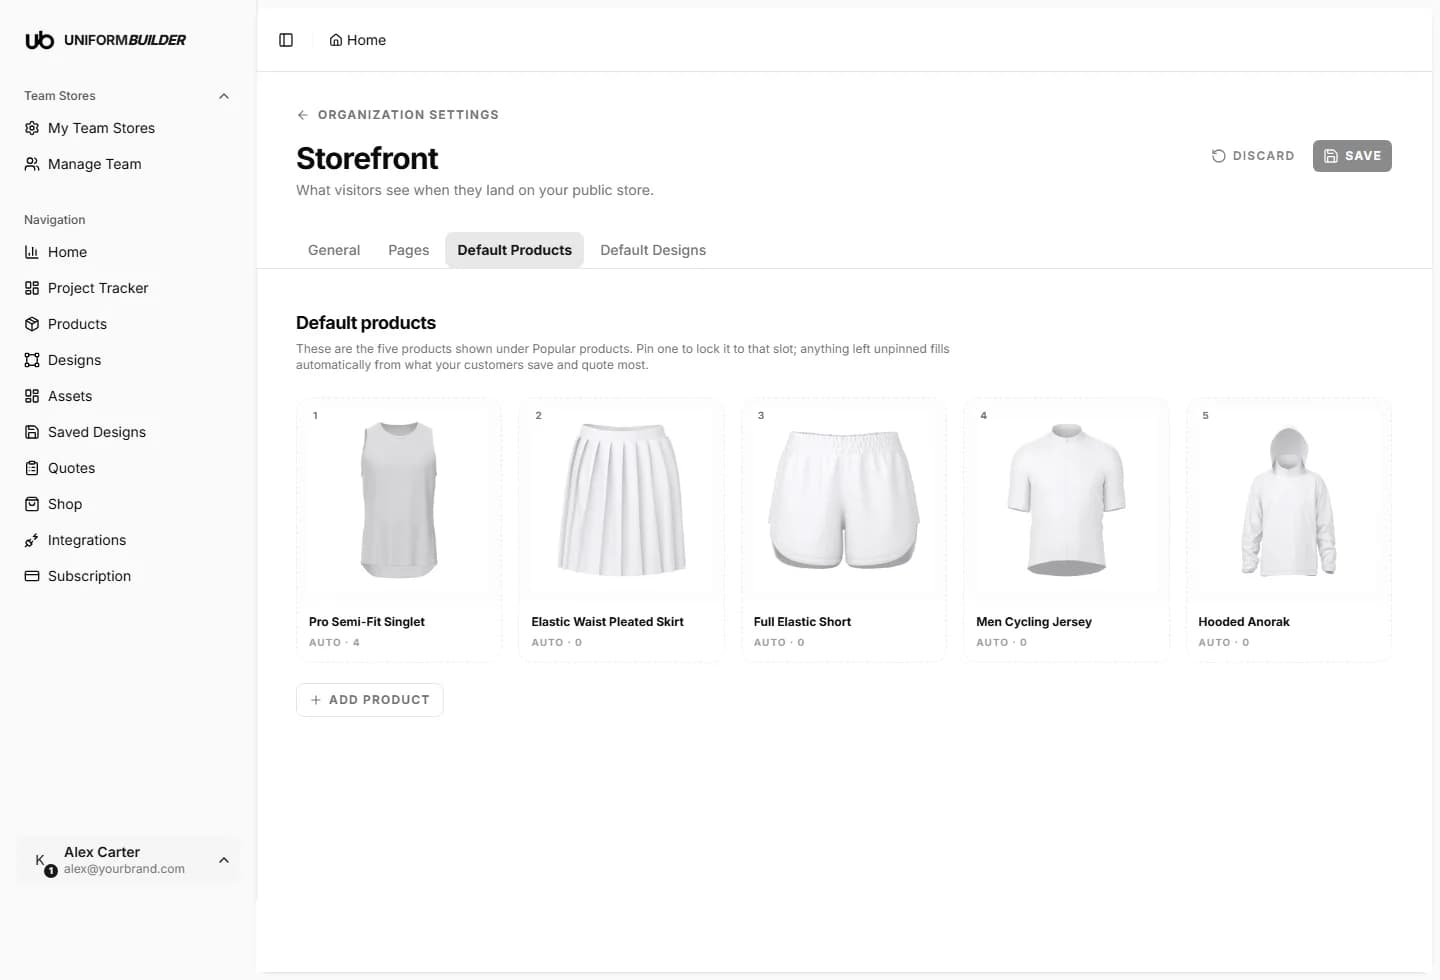
The Storefront card leads to the editor for your public landing page: the headline, the highlights, and which products and designs lead the page.
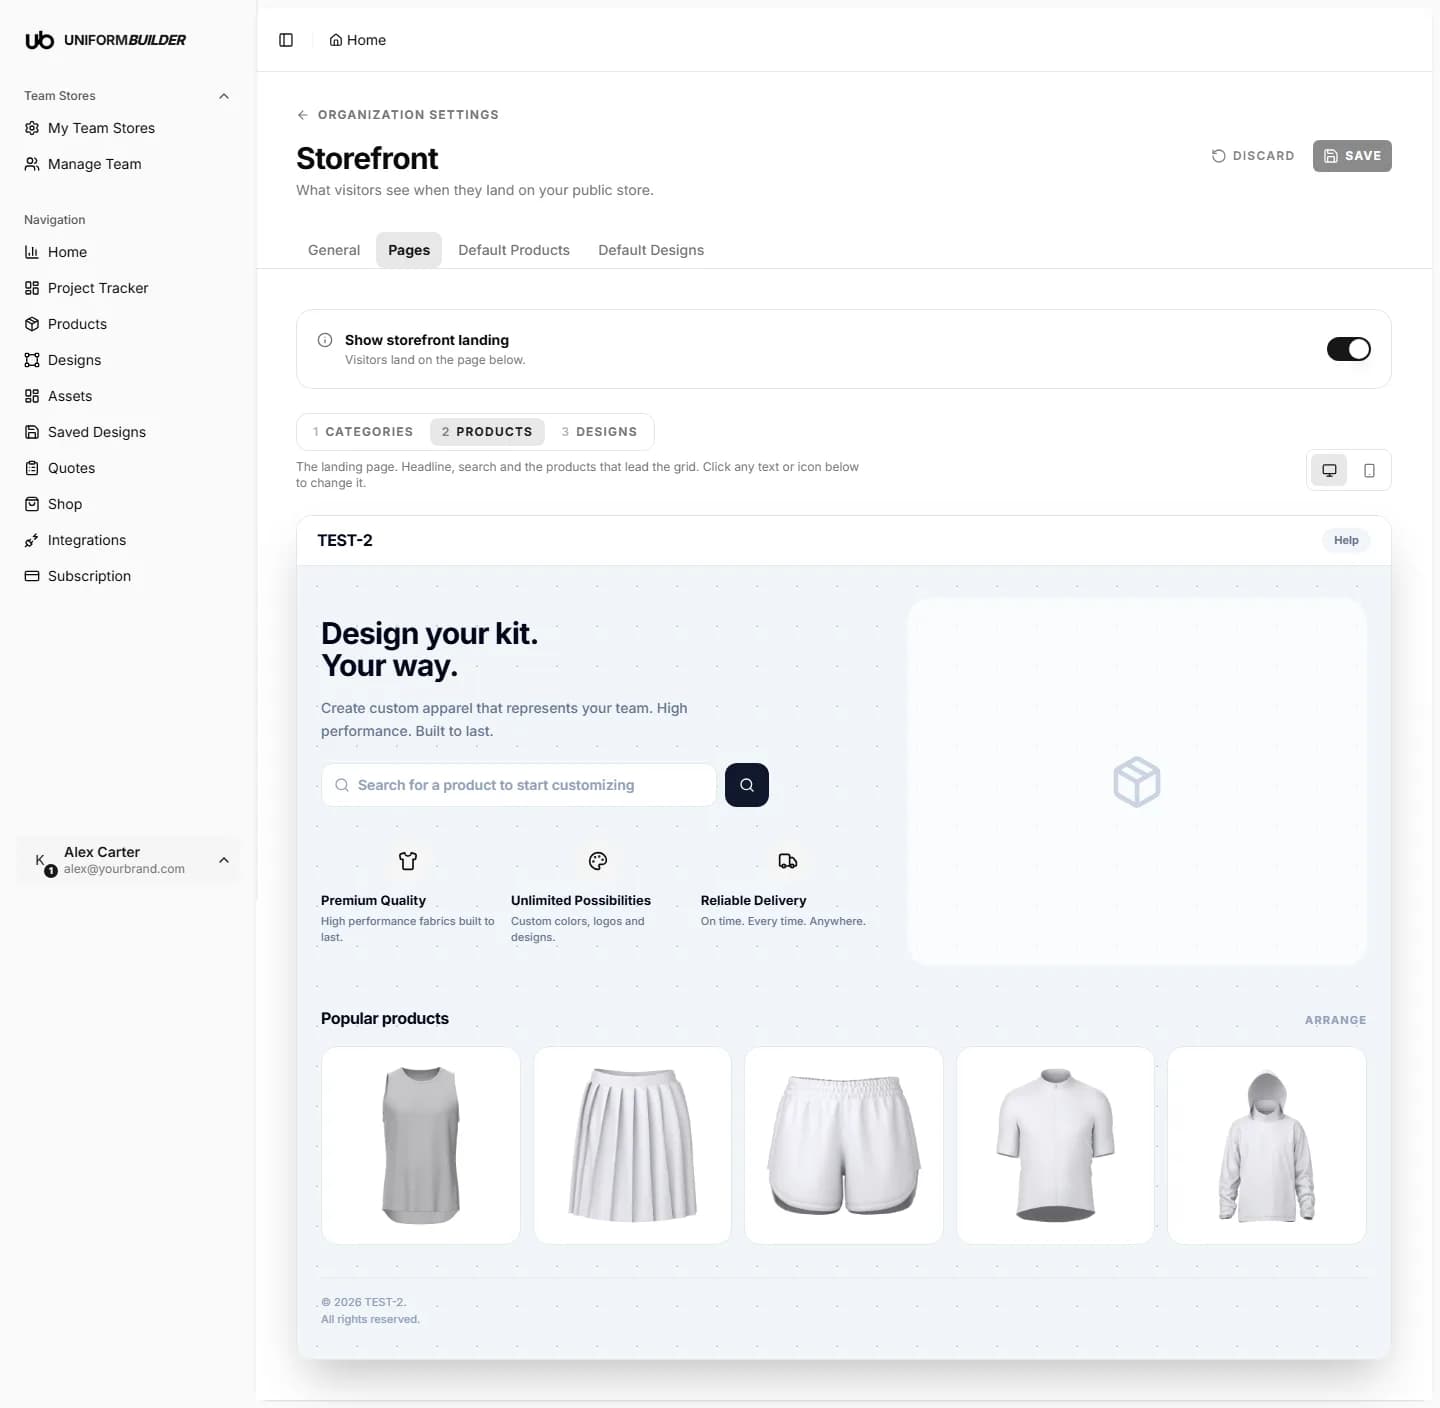
- Landing sets the headline and supporting copy customers read first.
- Products chooses which products appear, and in what order.
- Designs chooses which designs are promoted on the landing page.
Note
Leave a copy field empty and the default wording is used. You only need to write the parts you want to change.
Deleting a store
The Danger zone at the bottom of the settings page deletes the store. It removes the organization, its products, and collaborator access.
Careful
Deleting a store takes its public URL offline, which breaks every saved design link and every quote link that pointed at it. If you only want to pause a store, remove its products from the storefront instead.