
Products
Open /dashboard/productsProducts are the garments your customers open in the 3D designer. Each one carries a 3D model, a price, a set of allowed colours, and the print panels artwork can land on. This page covers everything you can do to one.
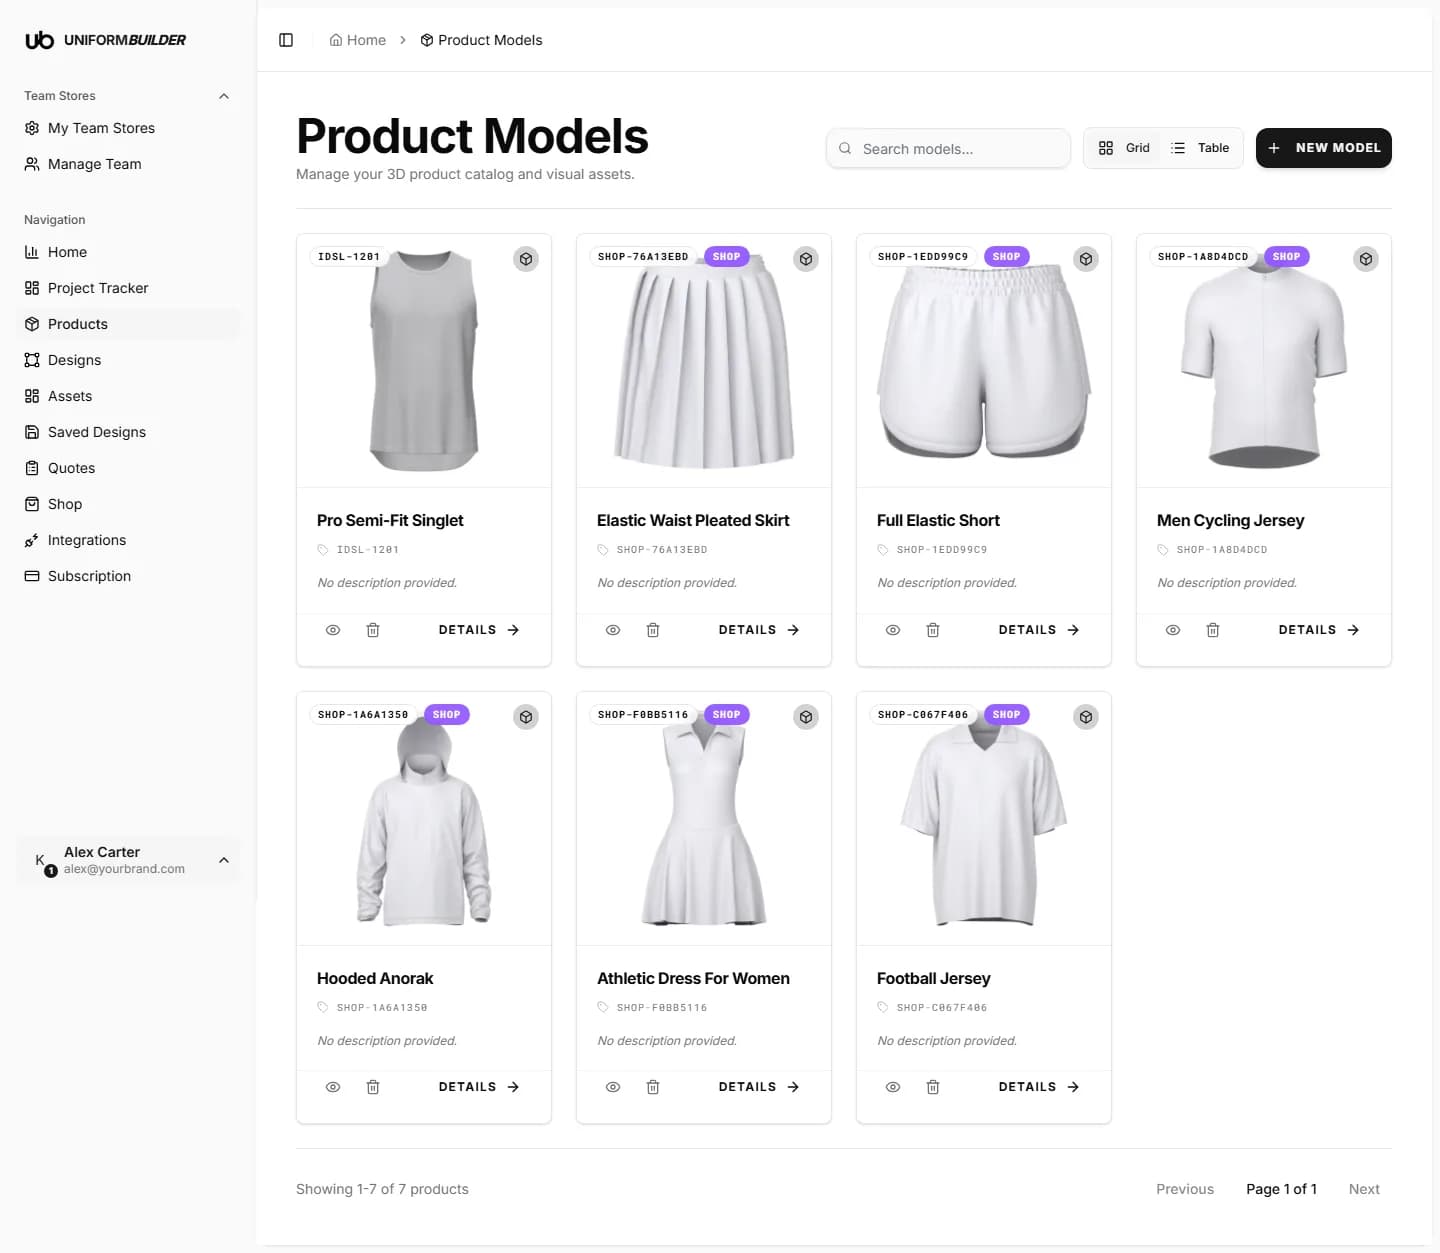
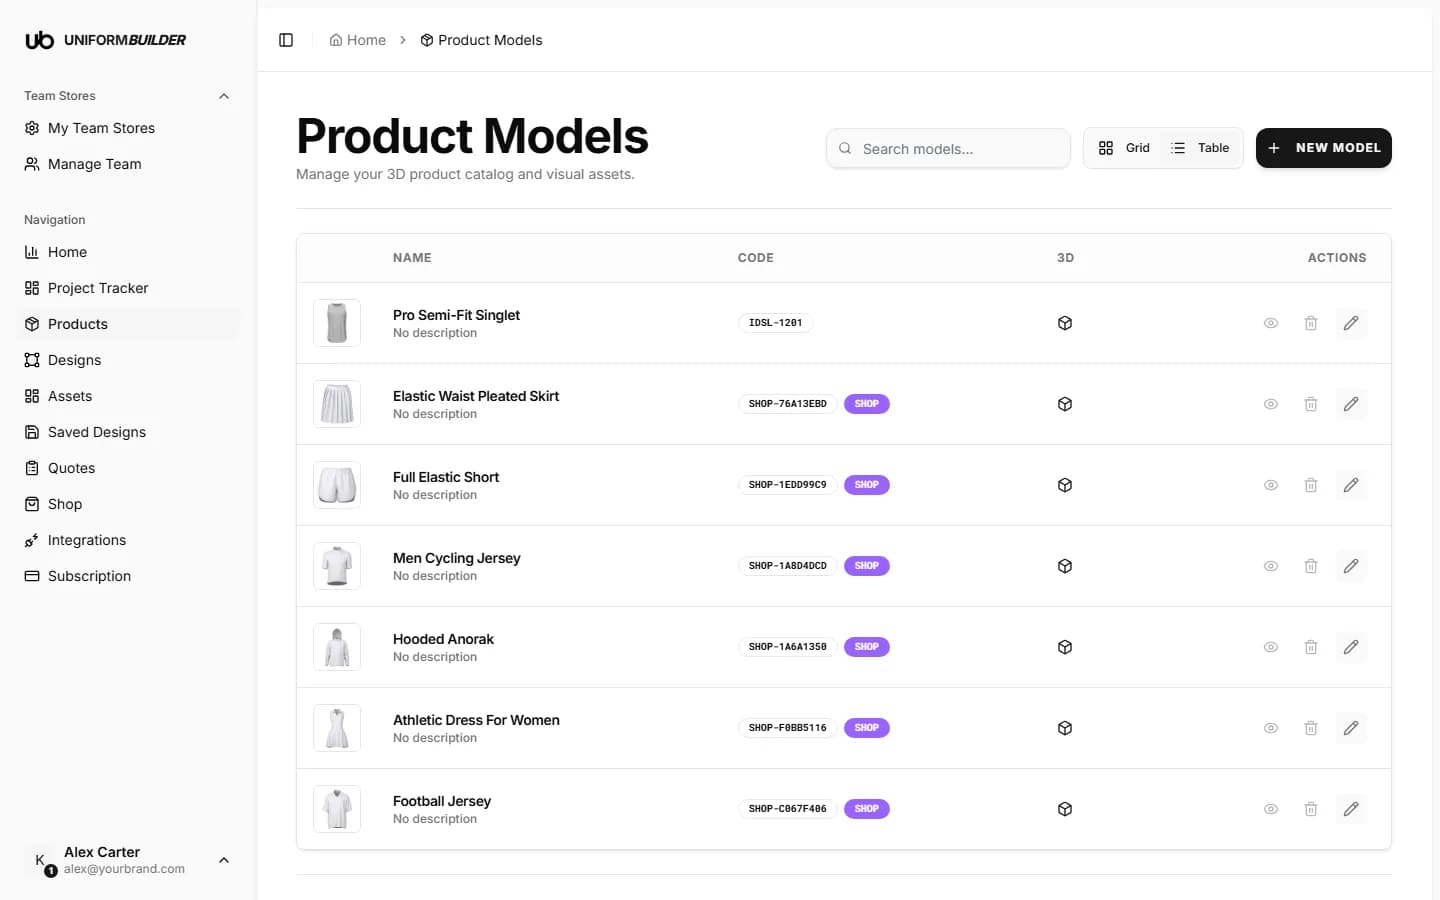
- Grid shows the models as pictures; Table is a denser list for scanning codes and prices.
- The search box filters by name or product code.
- On each card, the eye previews, the bin deletes, and Details opens the full product page.
Two ways to add a product
You can take a prepared model from the Shop, which is the fast path, or upload your own .glb file. Both end up in the same place: the product list.
Adding your own 3D model
- 1
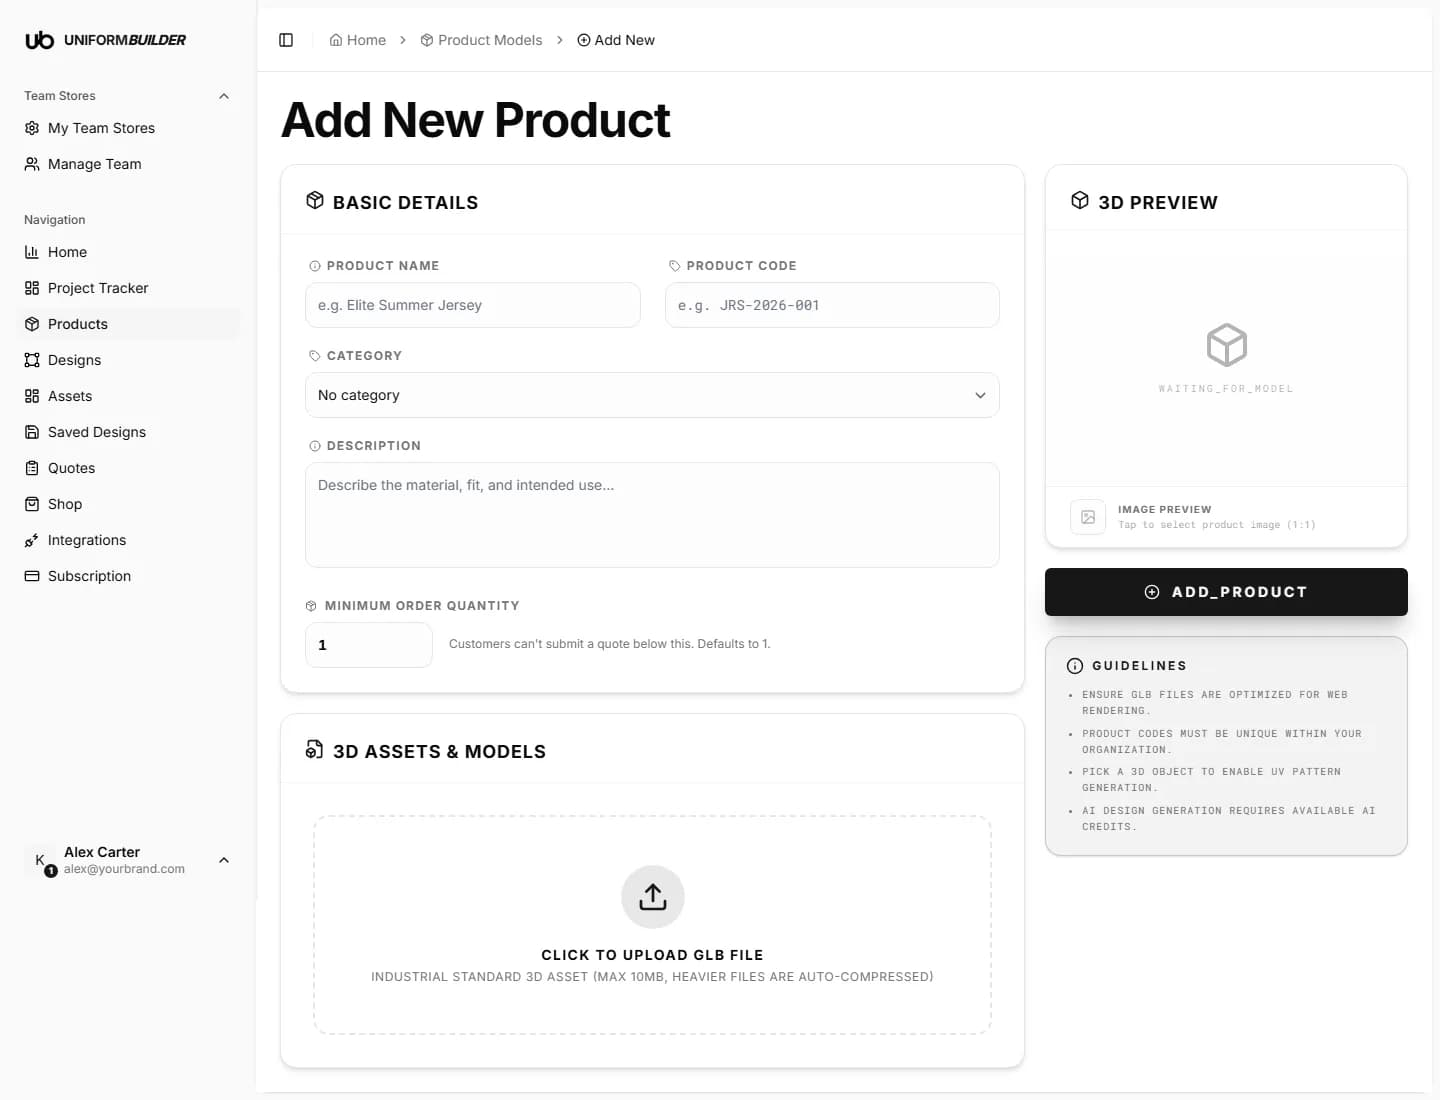
Open Products and press New model.
- 2
Fill in the basic details.
Name and product code are required. The code has to be unique inside your store.
- 3
Upload the
.glbfile.Maximum 10 MB. Heavier files are compressed automatically in your browser before upload, but a model that is still over the limit after compression is rejected.
- 4
Pick the 3D object that carries the UV layout.
The uploaded file is scanned and its mesh names are offered. Every 3D model stores a UV map: the flat print layout of the garment, exactly as the manufacturer cuts and prints it. Picking the right mesh lets the app read that layout out of the model and lay it flat, so artwork placed on the 2D pattern lands in the same place on the 3D garment. Skip it and the product cannot be printed on.
- 5
Press Render front view to generate the catalog image, then Add product.
Fields on the add form
| Field | What it does |
|---|---|
| Product namerequired | What customers see, for example "Elite Summer Jersey". |
| Product coderequired | Your internal reference, for example JRS-2026-001. It must be unique within your organization and appears on quotes. |
| Category | Groups the product on your storefront and lets you scope assets to a whole garment type. See Categories. |
| Description | Material, fit and intended use. Customers read this next to the 3D preview. |
| Minimum order quantity | Customers cannot submit a quote below this number. Defaults to 1. |
| GLB file | The 3D model, up to 10 MB after compression. Optimise it for web rendering: a heavy model is slow for every customer who opens it. |
Tip
If you do not have a 3D file, do not try to make one for the sake of it. Buy the closest model from the Shop and rename it to your own product name: your customers see your name, not ours.
The product Overview tab
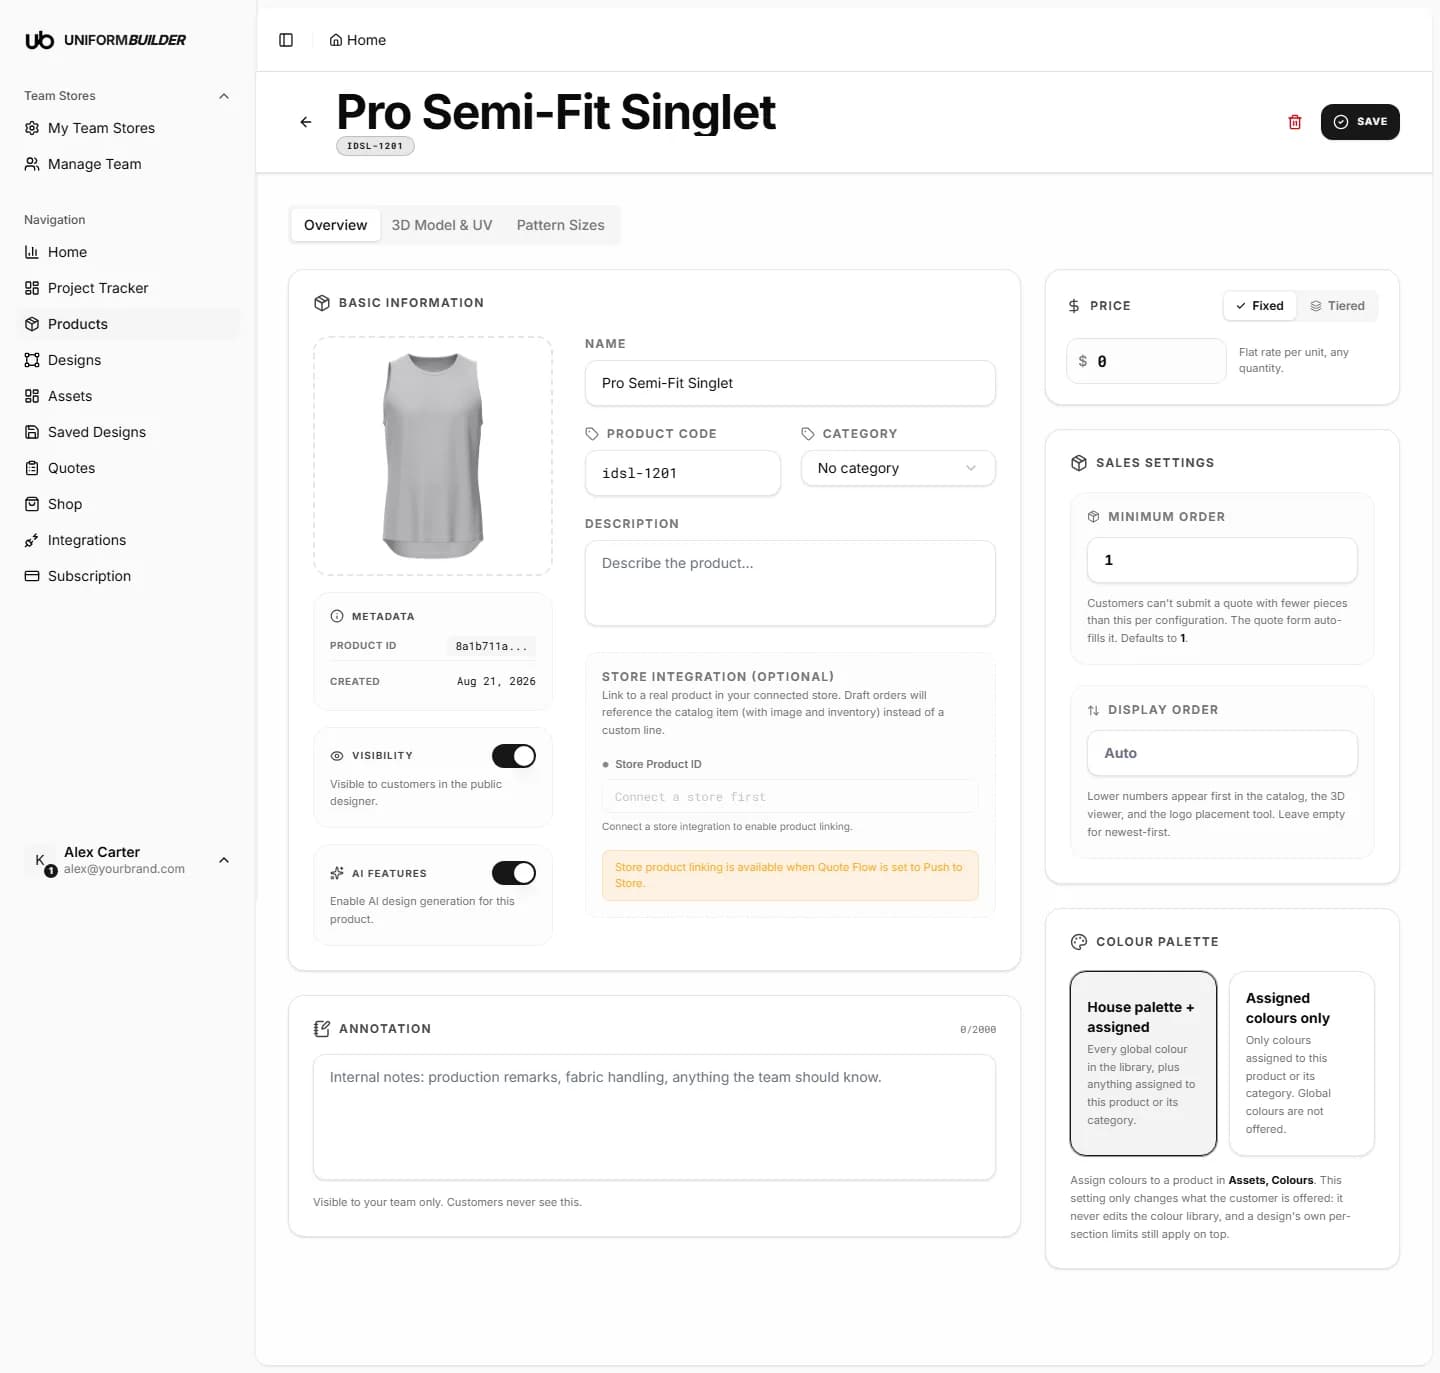
Opening a product gives you three tabs: Overview, 3D Model & UV, and Pattern Sizes. Overview is where the commercial decisions live.
Basic information
| Field | What it does |
|---|---|
| Product image | The catalog thumbnail. Click it to upload one, or generate it from the model with Render front view on the 3D tab. |
| Name, product code, category, description | The same fields as on the add form, editable at any time. |
| Visibility | When off, the product disappears from your public designer. Use this to take something off sale without deleting it. |
| AI features | Enables AI design generation for this product. Requires AI generation to be on for the store as well. See Team stores. |
| Store integration | Links this product to a real item in your connected shop, so draft orders reference the catalog item with its image and inventory instead of a custom line. Only available when quote flow is set to push to store. |
The Annotation box underneath is for internal notes: production remarks, fabric handling, anything your team should know. Customers never see it.
Price and sales settings
| Field | What it does |
|---|---|
| Fixed price | A flat rate per unit, whatever the quantity. |
| Tiered price | A price per quantity band, so 50 pieces cost less each than 5. This is how most teamwear is actually sold. |
| Minimum order | Customers cannot submit a quote with fewer pieces than this per configuration. The quote form fills it in for them. Defaults to 1. |
| Display order | Lower numbers appear first in the catalog, the 3D viewer and the logo placement tool. Leave it empty for newest first. |
Tip
Set tiered prices before you launch. A customer who sees a single high unit price on a 100 piece order tends to close the tab rather than ask.
Which colours this product offers
The Colour palette card decides what the customer can choose from on this specific garment.
| Field | What it does |
|---|---|
| House palette + assigned | Every global colour in your library, plus anything assigned to this product or its category. The permissive option. |
| Assigned colours only | Only colours assigned to this product or its category. Global colours are not offered. Use this when a garment can only be produced in a specific range. |
Note
This setting only changes what the customer is offered. It never edits your colour library, and a design that limits its own colours still applies its limits on top. Colours themselves are assigned in Assets → Colors.
The 3D Model and UV tab
This tab is about the geometry: the 3D file itself, how it is unwrapped into a flat pattern, and what each panel of the garment is called. You rarely need to touch it for a model bought from the Shop, because it arrives already prepared.
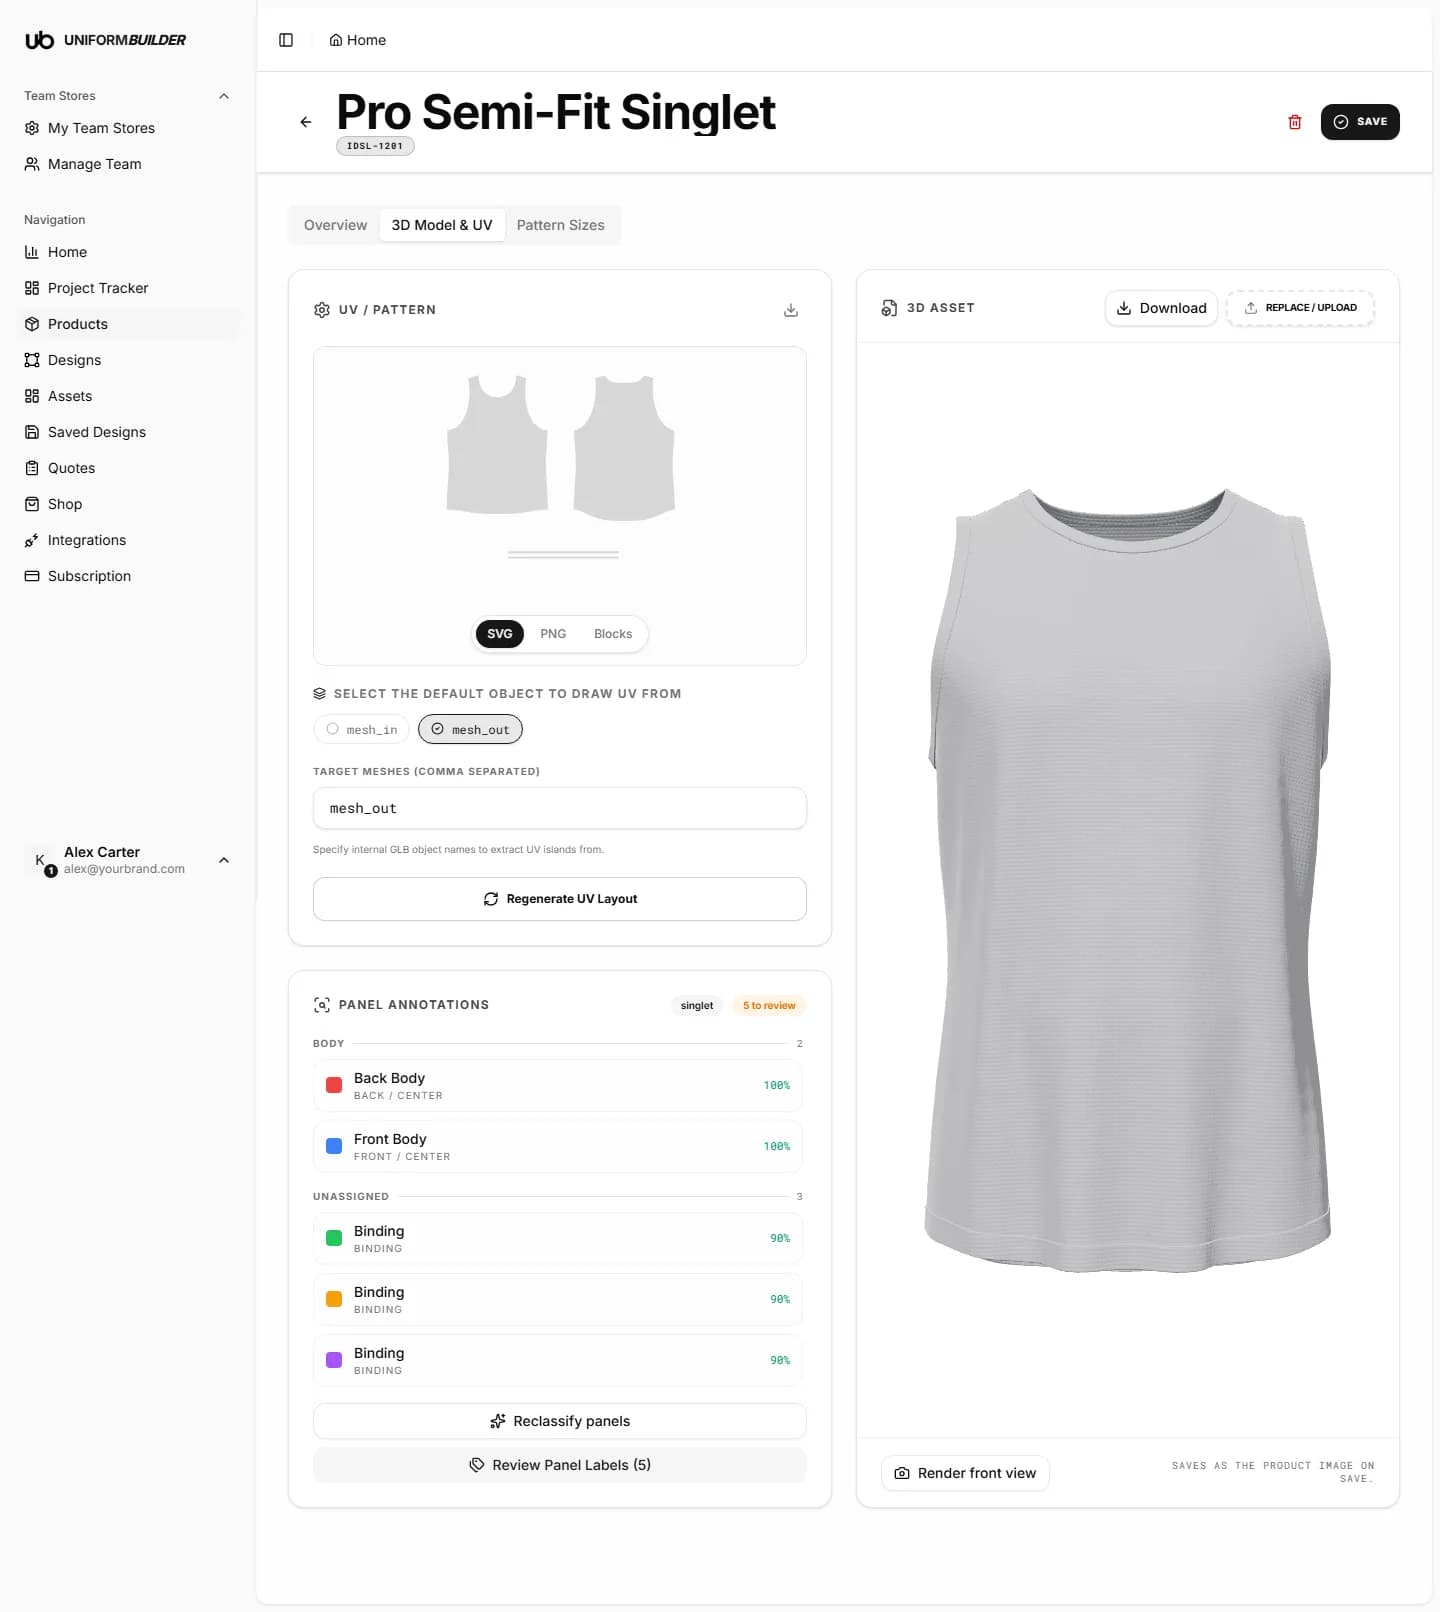
UV / Pattern
The UV layout is the garment flattened out, the same way a paper pattern is. It is what artwork gets printed onto, so a good layout is what makes a design land in the right place on the finished garment.
- SVG / PNG / Blocks switch how the layout is displayed. SVG is the vector outline, Blocks is a simplified view of the panel areas.
- The download icon saves the layout, which is useful to hand to a printer or a pattern maker.
- Select the default object to draw UV from picks which mesh inside the 3D file the layout is generated from.
- Target meshes lets you name several meshes, comma separated, when the garment is built from more than one object.
- Regenerate UV layout rebuilds it after you change those choices.
Careful
Regenerating the UV layout changes where artwork sits on the garment. Do it before you publish the product, not after customers have saved designs against it.
Panel annotations
Panels are the named areas of the garment: front skirt panel, back skirt panel, waistband. They are grouped into Body and Trim & details, and each one carries its placement (front, back, centre) and a confidence percentage from the automatic detection.
These names matter because they are what a customer sees when they choose where to put a logo, and what your production team reads on the tech pack.
- 1
Press Review panel labels to check the detected names.
The badge next to the product name tells you how many are waiting for review.
- 2
Correct anything that reads oddly.
A low confidence percentage is a hint, not a verdict: check the ones in the eighties as well.
- 3
Press Reclassify panels to run the detection again after replacing the model.
3D asset
- Replace / Upload swaps the
.glbfile for a new one, for example a corrected mesh from your 3D artist. - Render front view takes a picture of the model as it sits in the viewer and saves it as the product image when you press Save. This is the quickest way to get a clean, consistent catalog thumbnail.
Tip
Rotate the model in the viewer to the angle you want customers to see first, then press Render front view. Every product photographed the same way makes a storefront look deliberate.
The Pattern Sizes tab
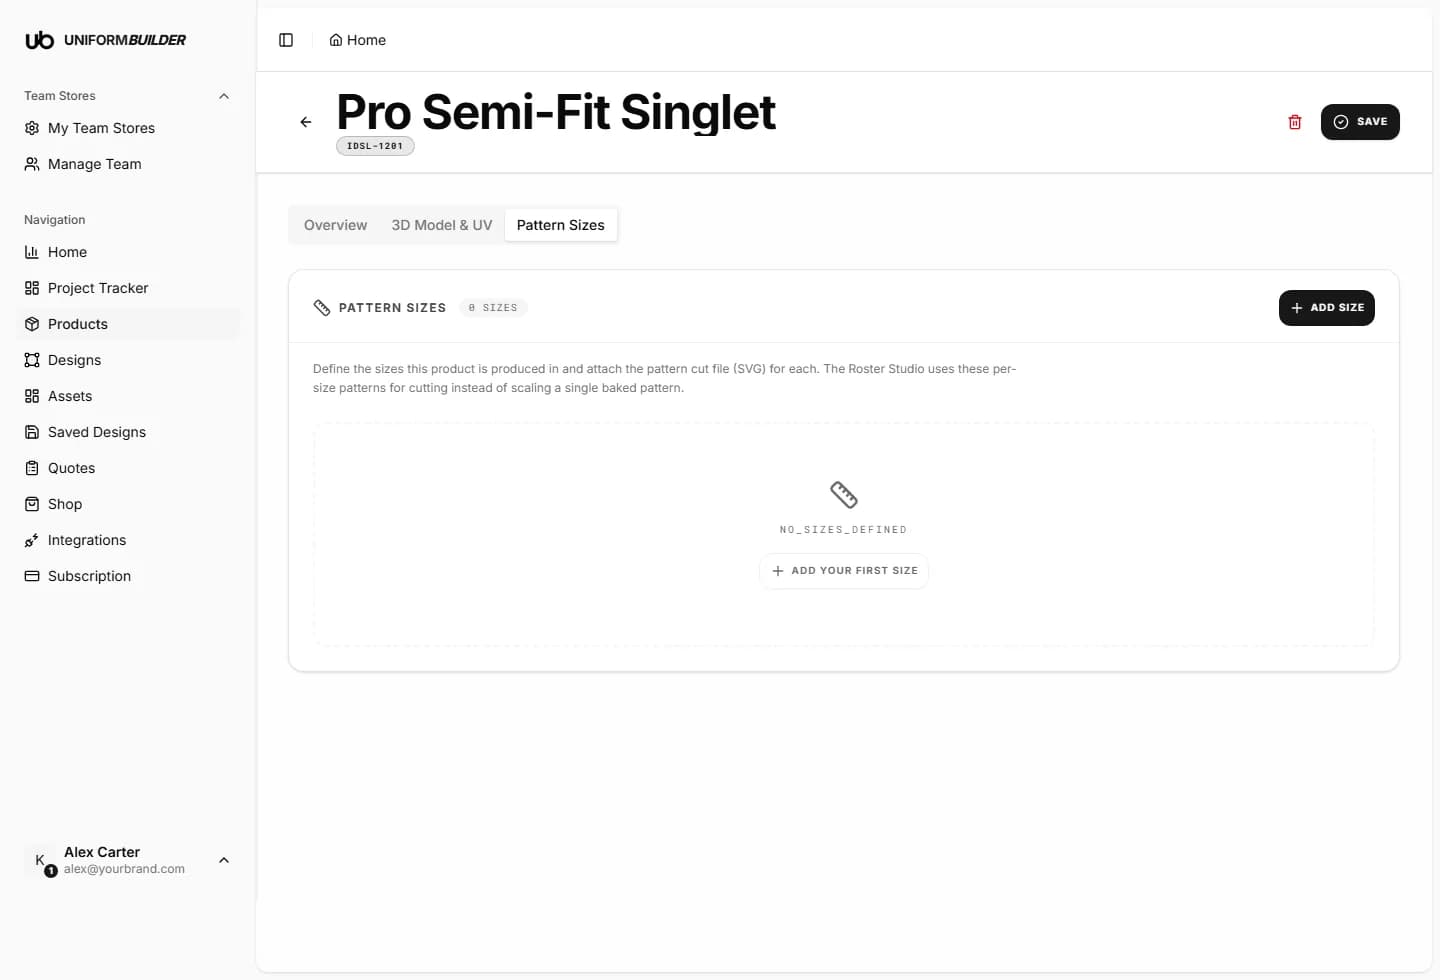
Pattern sizes hold a cut pattern per size, so a design placed on a small does not come out stretched on an extra large. Each size gets its own pattern file rather than one file scaled up and down.
Note
If you do not add per-size patterns, the product still works: the designer uses the single pattern for every size. Add them when print accuracy across the size range matters to you.
Deleting a product
The bin icon next to Save removes the product. It disappears from your storefront, so customers can no longer design with it.
Careful
Quotes that already reference the product keep their record, but the product page behind a shared saved-design link stops working. If you only want to take something off sale for a while, switch Visibility off instead of deleting it.